
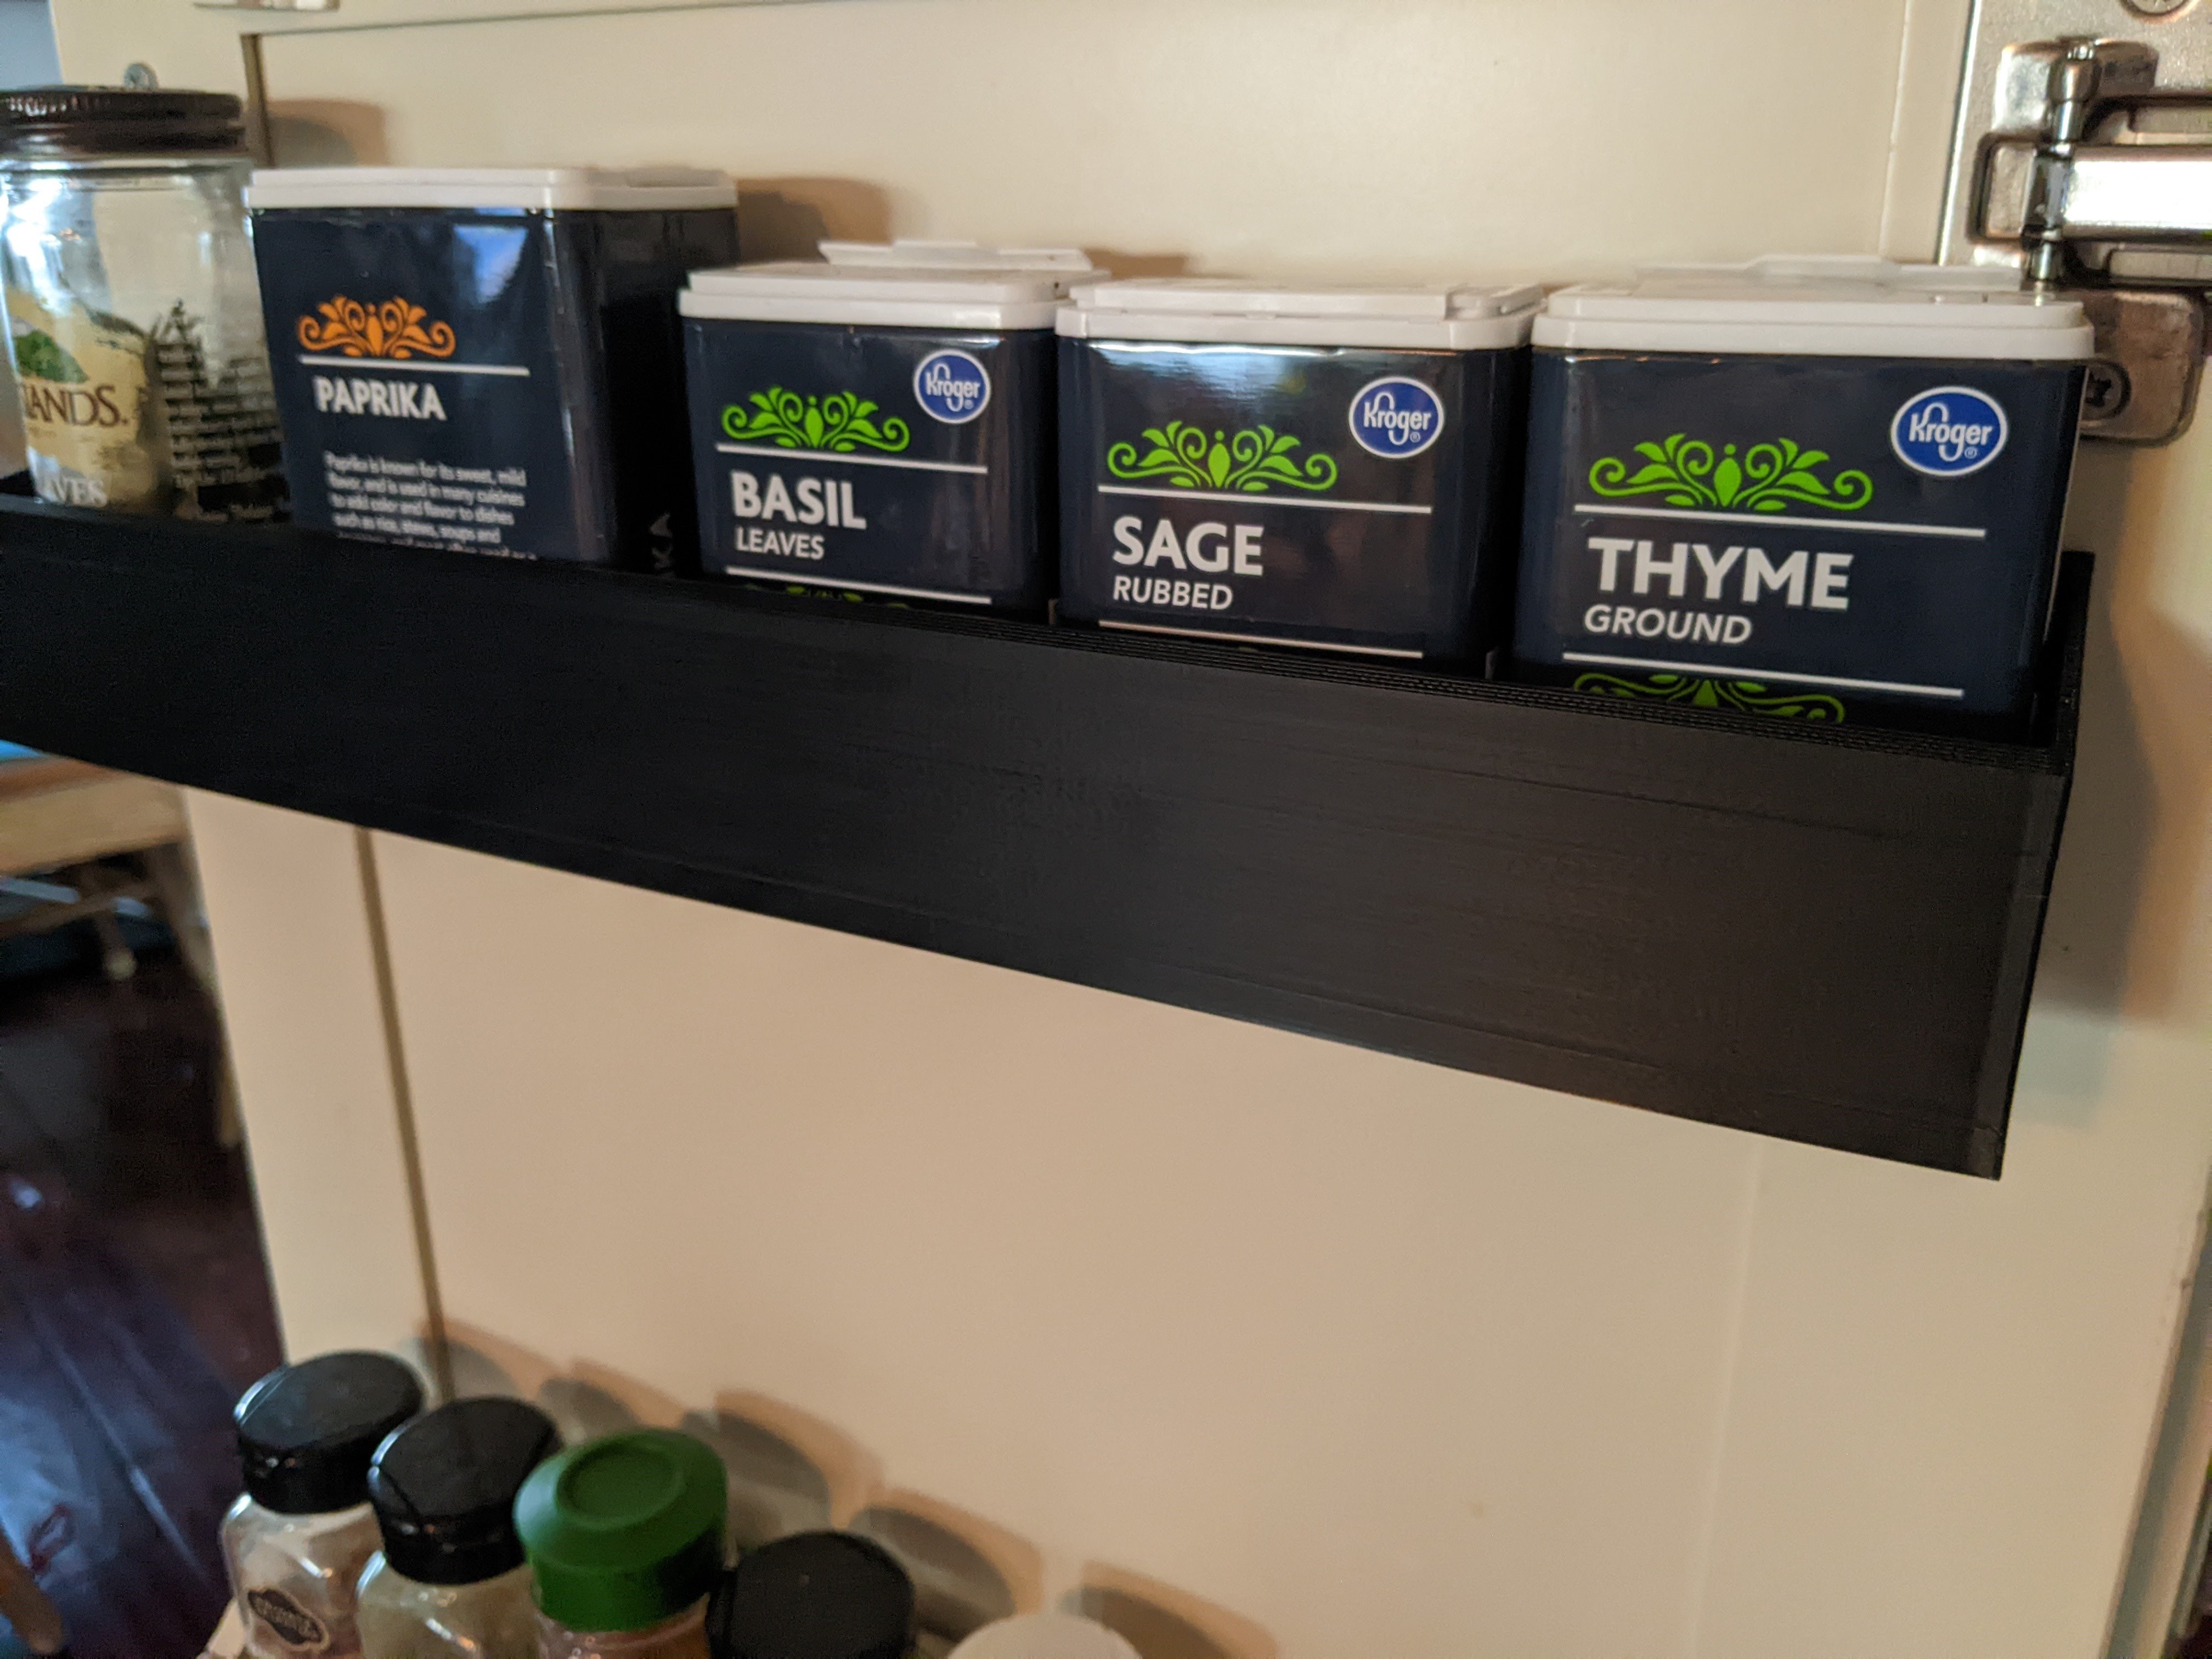
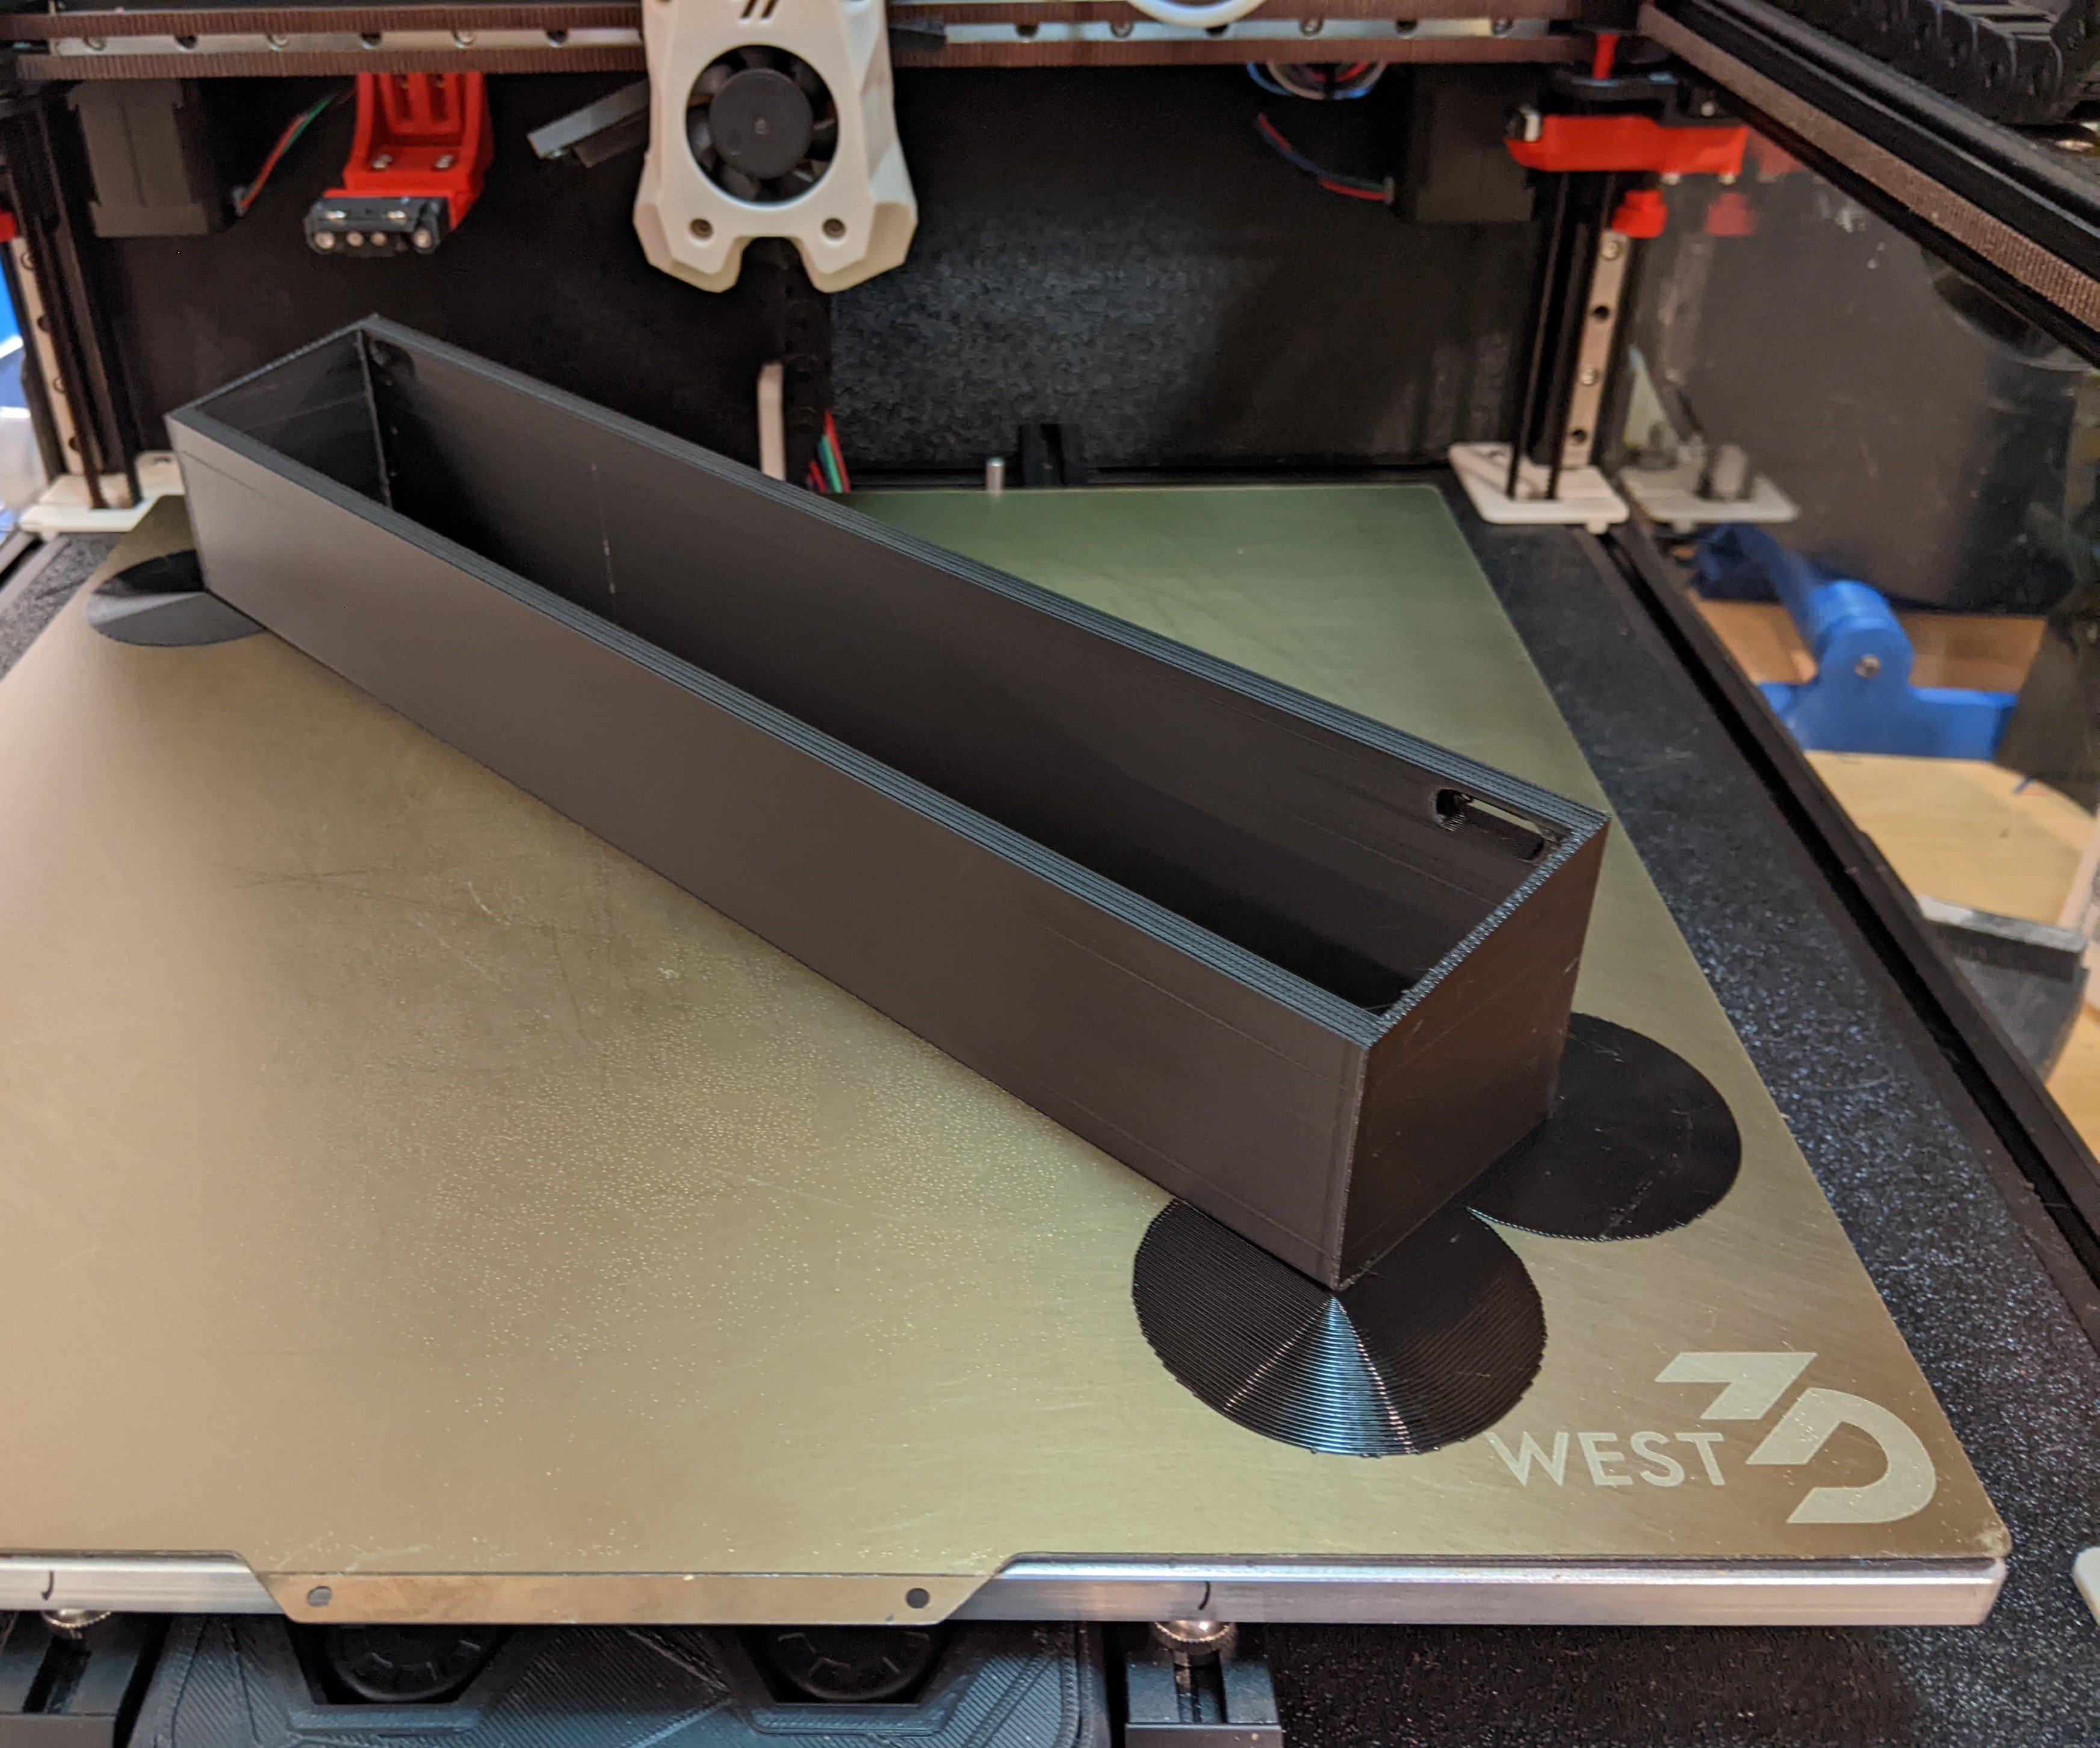
The part is a 345mm x 60mm spice rack that mounts to the inside of our pantry door.
About 7 years ago, I made four spice racks out of wood and painted them to match our cabinet door. Wear and tear (and kids) have resulted in them getting glued back together multiple times. I finally gave up, modeled the design, and have been printing replacements in PETG as they fail. So far they’ve been holding up a lot better. They’re also a touch deeper than my original wood design, so they can fit the round spice island containers more easily.
In the past, I had to print these in two halves on my i3 clone (a Monoprice Maker Select Plus, which is a rebadged Wanhao Duplicator i3 Plus). Now that I have a printer with a 350 mm^2 bed, I thought I would see if I could print the rack in one piece. My single ASA attempt was an epic fail due to warping, but the PETG print went very smoothly with very minor lifting. I’ve read others say PETG does not like enclosures, but I’ve printed a number of PETG parts with my Voron fully enclosed and they’ve come out very well. I struggled with PETG warping on larger parts with my unenclosed i3 clone.
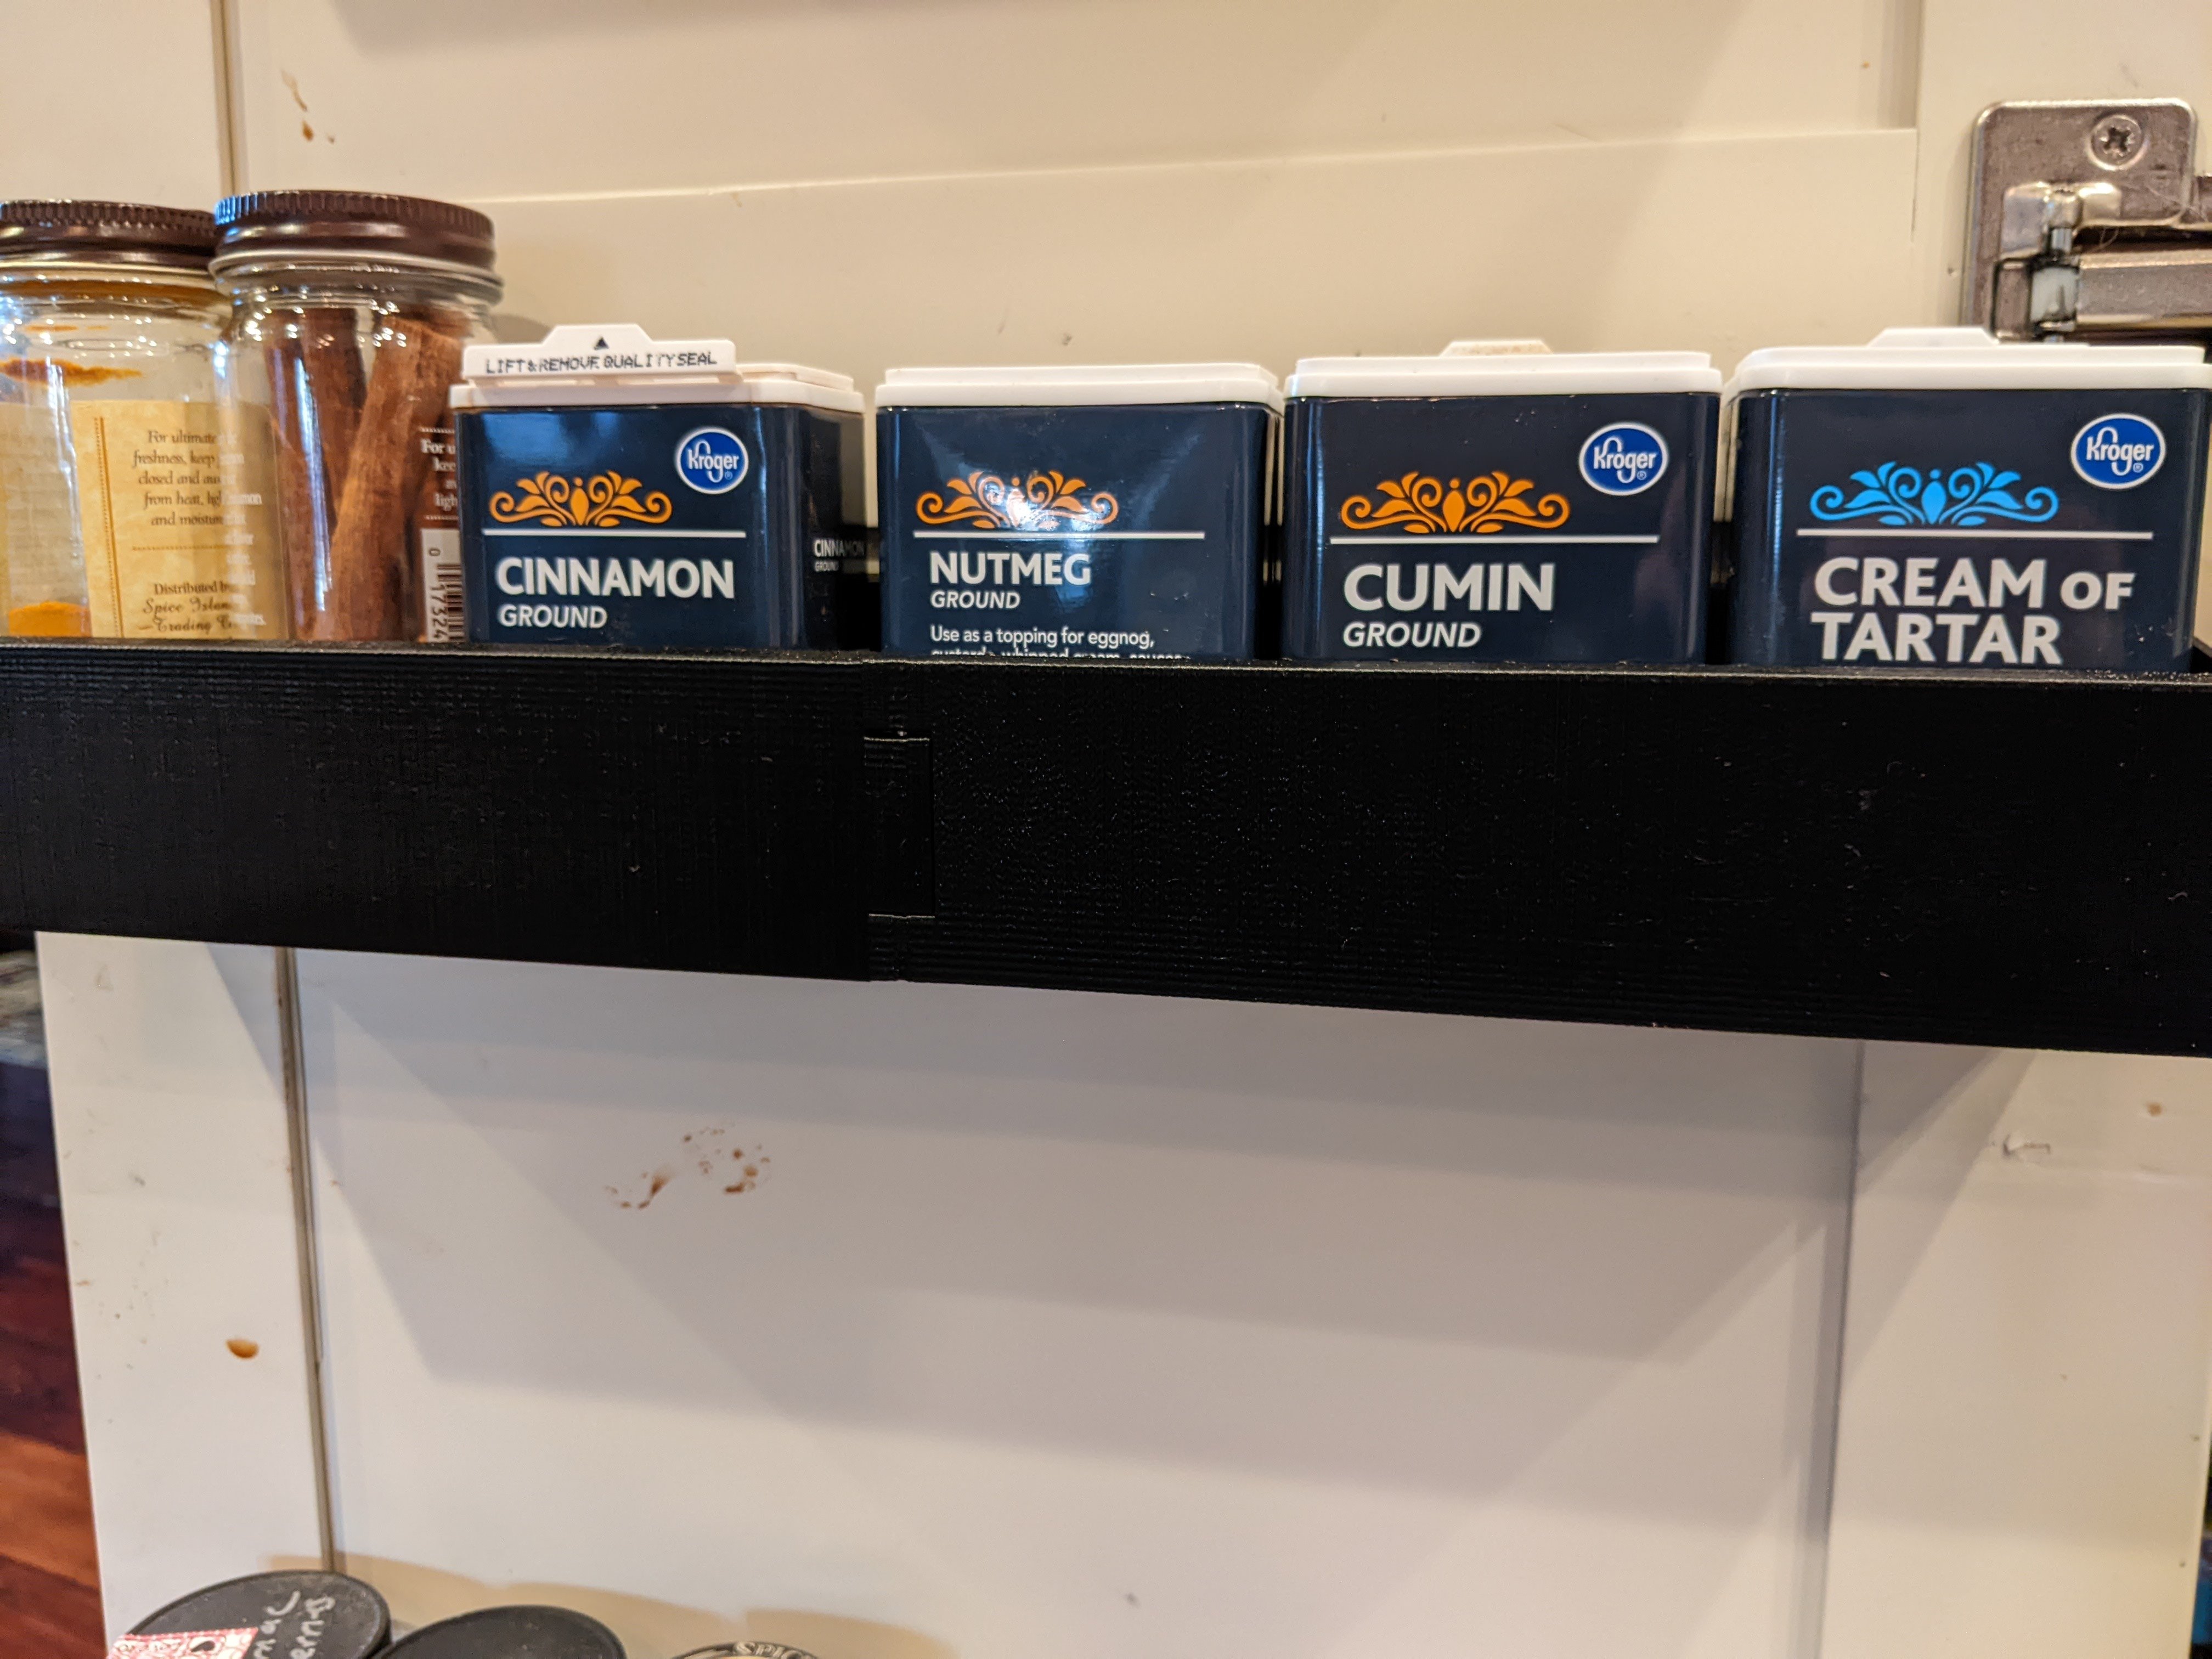
Here are a few photos comparing a rack I printed on my i3 clone to this one. The print quality is quite a bit better, but now that I have a higher ceiling to shoot for I’m realizing I have a further to go on my tuning journey. I will say that I never noticed things like the Slic3r buldge, that’s also present in Super Slicer, until now.
I personally find it helpful to see other’s prints under unflattering lighting, so with that said…
Somewhat flattering lighting (eg ambient)
Voron:
i3 clone:
Direct light, provided via a flashlight, perpendicular to the surface
Voron:

I3 clone:
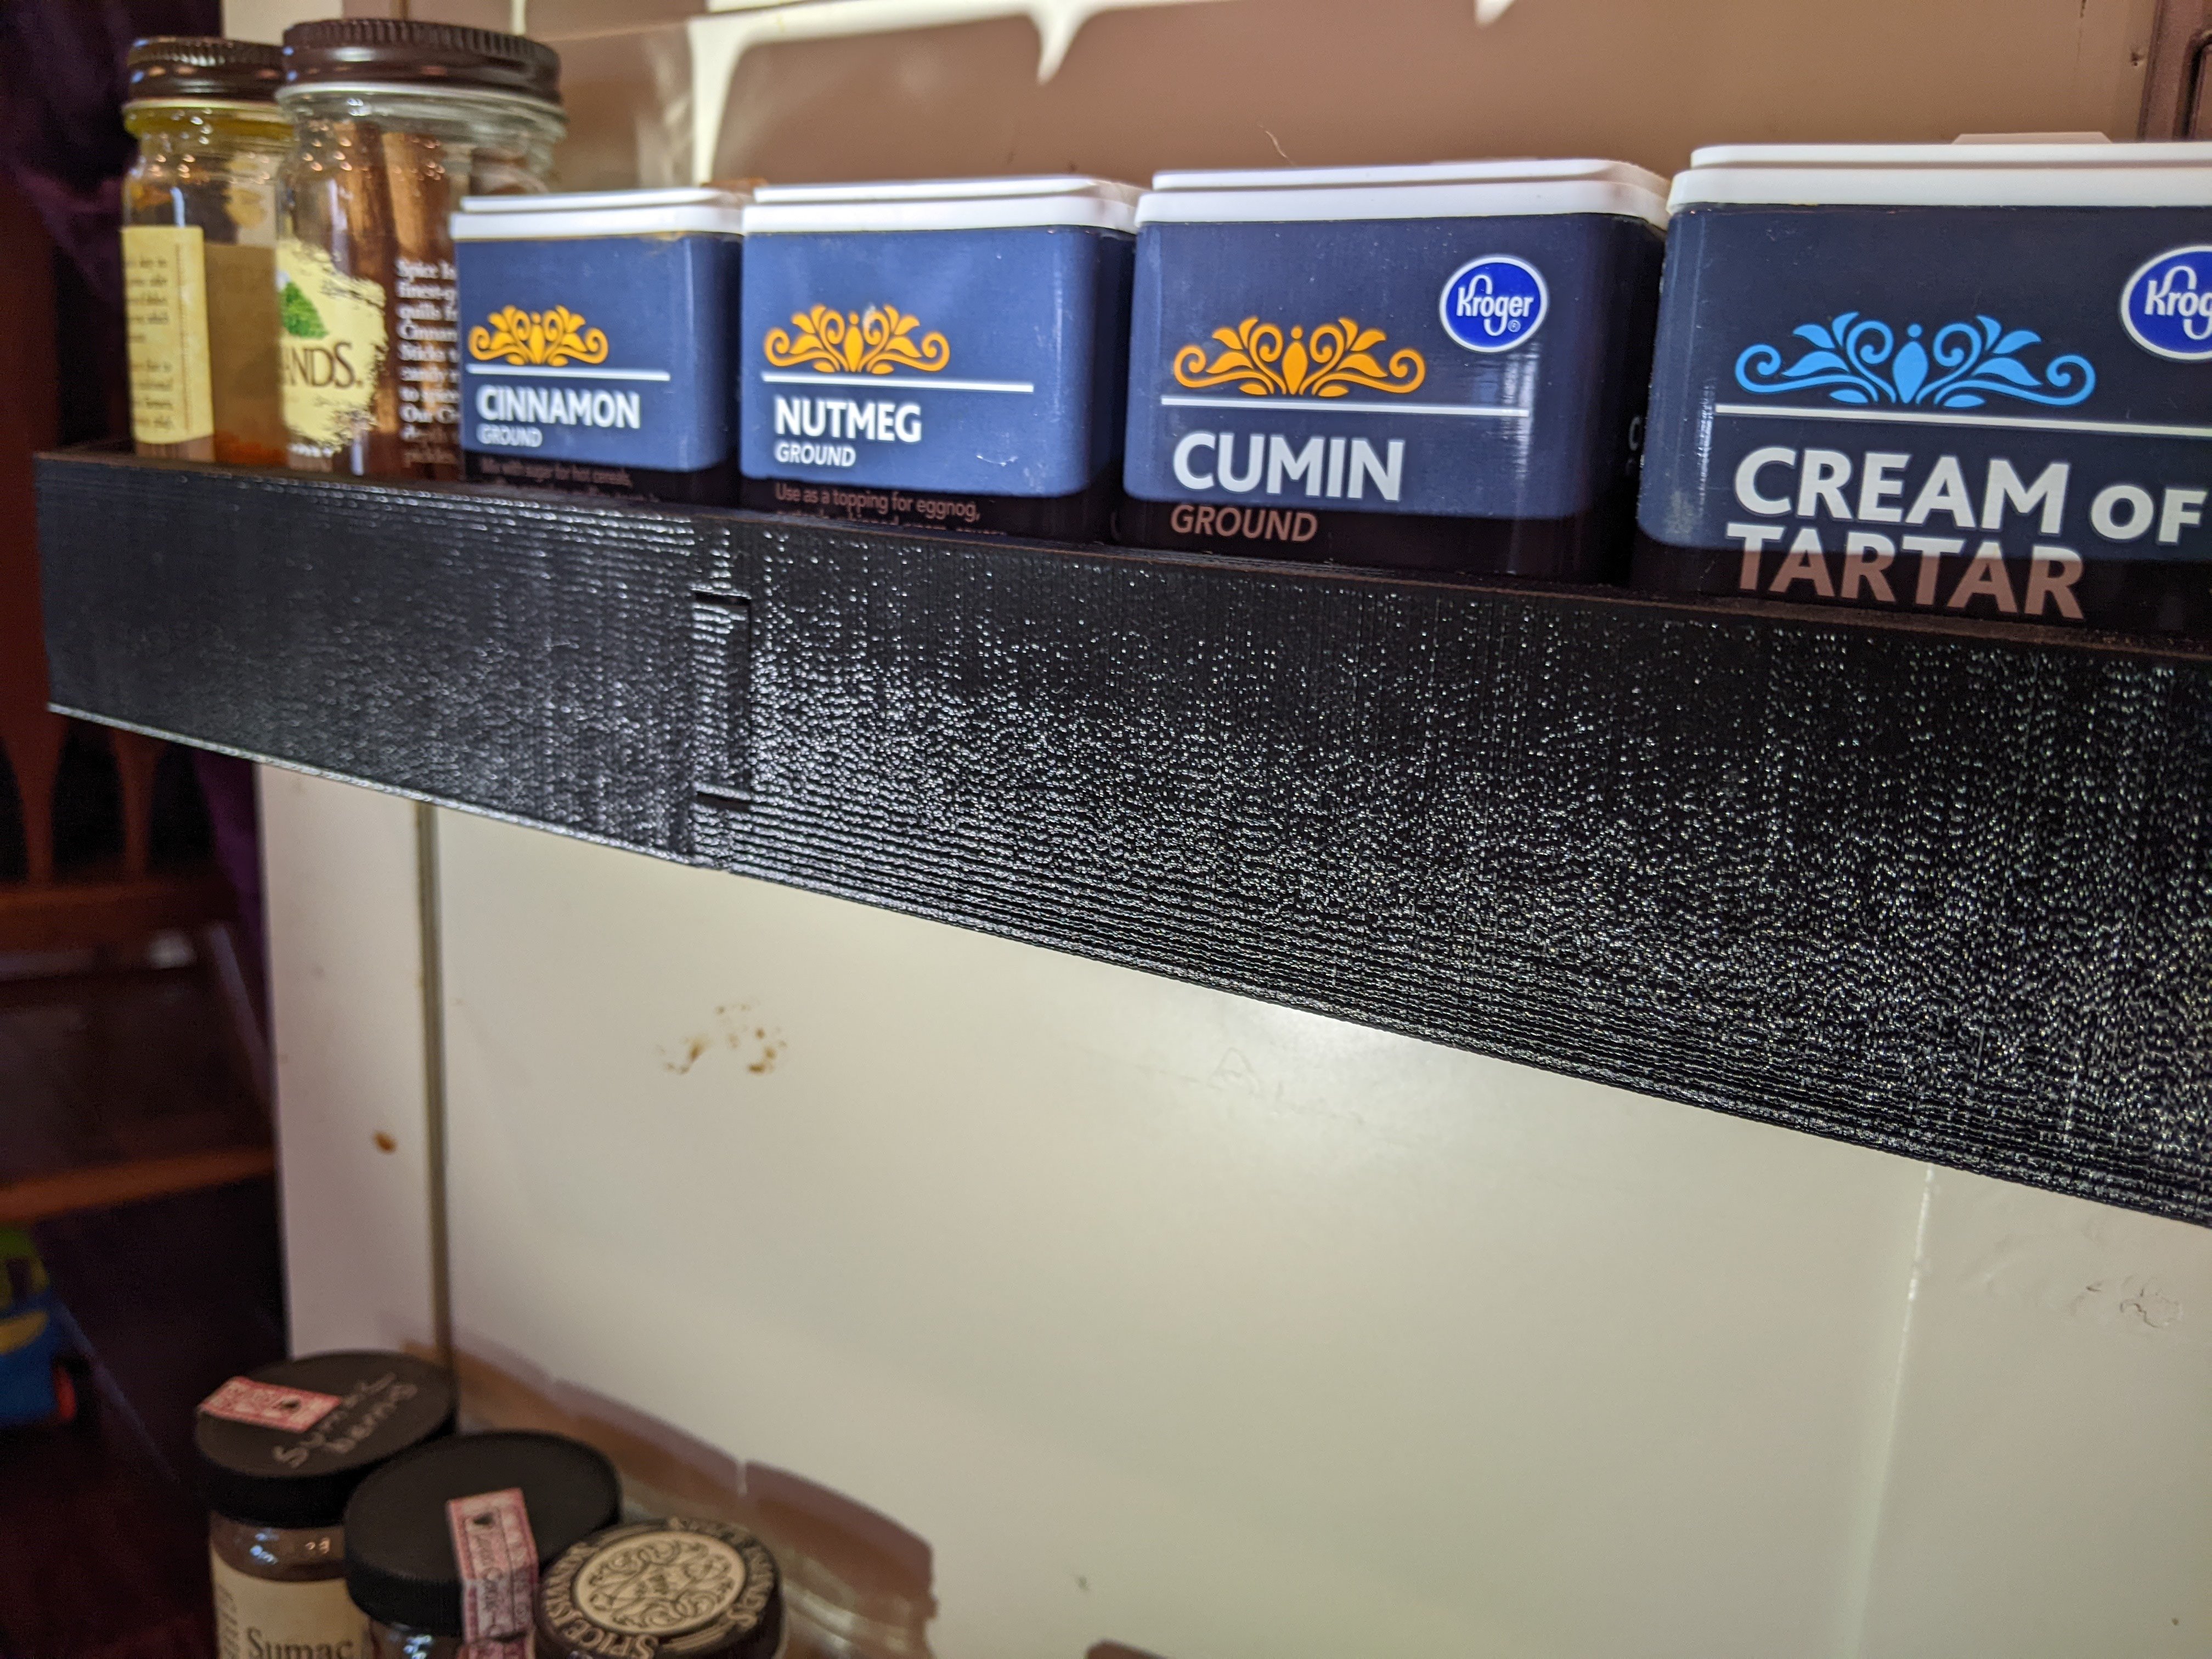
direct light, provided via a flashlight, nearly parallel with the surface
Voron:

i3 clone:

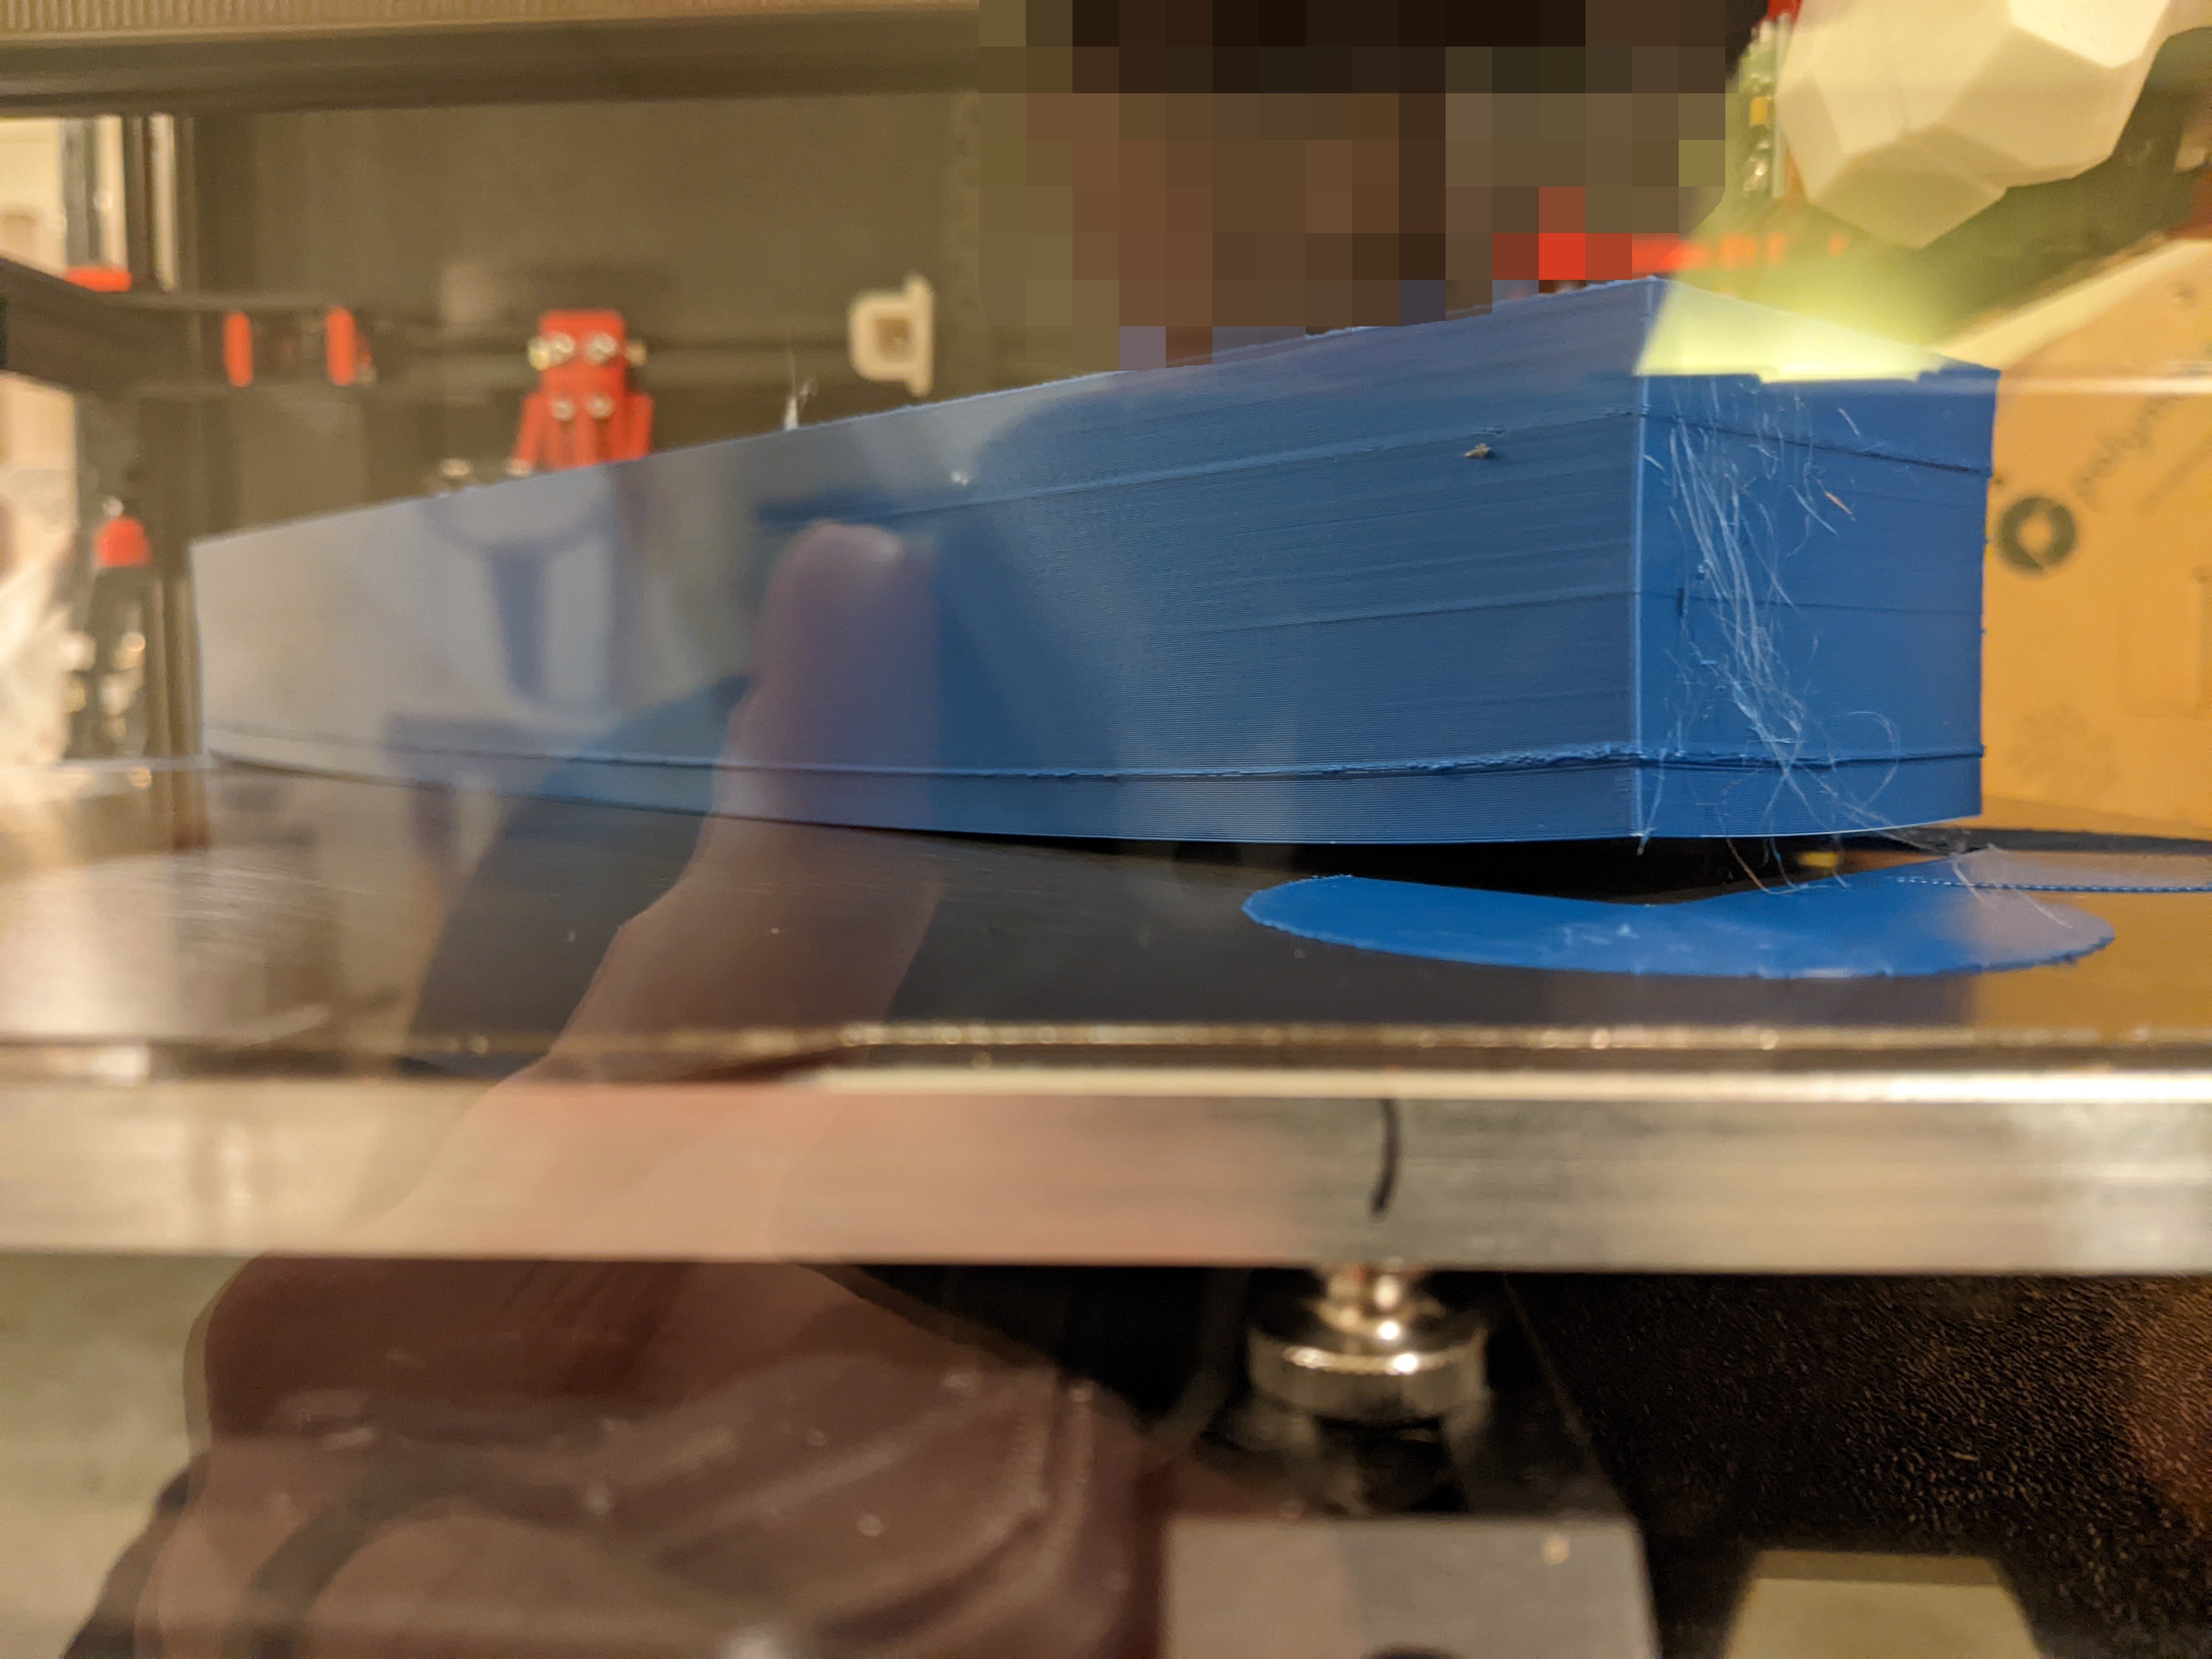
Bonus photo of my ASA attempt
Sadly, I forgot to change my print temp back from 250 to 240, so there’s quite a bit of wispy stringing. I suspect the print would have separated from the bed anyway. Any pointers here would be appreciated. The bed was clean (soap + water), was at 100, I let the printer heat soak for about 45 minutes with the filter going full tilt, first layer squish was solid good, smooth PEI (the textured side seems to have prints come loose more easily).
Do you use glue or hairspray for ASA ? I could not manage warping without hairspray.
It looks like your corners separate from the border. I have this issue du to the new “smart” borders from Cura. It turns in the other direction for this to be easily removed… I have disabled this feature.
The last idea if everything fails : I had to change the geometry of the thing to prevent big long fat stripes like the bottom of your item. Making it an hexagonal grid may help to diffuse the forces. The shrinkage will be diffuse instead of along the stripe.
No glue or hairspray. I’ve run a few kilos of ASA through the printer, but this is by far the highest aspect ratio print I’ve tried so far. Even if it had stuck to the bed, it’s possible that the bed itself would have lifted. I’ll have to try a longer pre-heat or just not attempt parts with this geometry in ASA.
The model was sliced in super slicer. There might be an option for an easier to separate brim, but it’s not enabled for me.
What chamber temp are you using for such a large part? I’d recommend at least 70+C but that might be hard to reach with acrylic panels.
Your bed will also warp due to the heat since its rigidly mounted.
For the black PETG part I doubt it got that hot, but I’m sure it was above ambient by 5-10 degrees C. 70 degree bed and my filter/bedfan combo at 30 percent.
For the ASA part, I let the printer soak after the bed hit 100 C with 100% bed fans. I’m not sure what temperature the chamber reached due to not having a thermostor.
Do you think the ASA print would have succeeded with a hotter chamber? If yes, I’m all in on adding some more bedfans, a chamber thermostor, and swapping some panels for better insulating ones. I’m trying to figure out if there’s a wall to what you can reasonably expect from ASA or if there’s still some low hanging headroom that could be unlocked with better heating.
ASA and ABS definitely do better at elevated chamber temps. What temp is enough I can’t say but I still saw improvements when going from 50 to 70c. Higher temps also let you use more fan speed without the added risk of warping so you’ll probably see better overhangs even though the temps are higher.
Id start with adding some chamber temp sensors first so you can measure what difference you are making with the other mods.
Using 4 mm abs panels I saw about a 15c improvement by just throwing a fleece blanket over the printer, so that might be an easy fix if you don’t print large parts frequently. Although higher temps are also great for layer adhesion on smaller parts.
Thanks for the feedback. I’m thinking a mix of thermostors, two more bedfans, and better insulation is my next step for less ASA warpage.
I never used ASA, but can jump in with few designing tips. I see you are already using mouse ears, but you can also add bigger filets in corners and maybe make few holes on the bottom (not large enough to allow containers to fall down ofc). It might not fit to your liking or needs tho
You’re right, this design doesn’t lend itself to a high warp material. I wanted it to match the existing shelves as best it could, so I didn’t modify the design.
Fillets aside, I wonder if inverting the print so the solid surface was at the top would have helped with warping. I would have obviously needed to mess with the overhang angle to not keep it too extreme.
I am having the same problems as you with ASA (and ABS also). If the footprint is large I get warping. If the footprint is small, I get warping and also the friction from the nozzle rubbing on the top layers pushes the part loose from the sheet. So if you do try that, keep an eye on it!
I’ve tried Magigoo and that helped a bit. I ordered a Fabreeko “Honey Badger” sheet that some people online were raving about as solving all their problems. But I’m expecting I won’t actually solve the problem unless I have a somewhat heated enclosure.
I’m hoping to see something else to try in this thread, though!
I don’t have any problems with small parts. For example, I reprinted my Stealthburner with zero issues. I’ve done some larger parts as well, but I designed those to be easier print with large radius corners.
I’ve mulled over the same PEI sheet, lol. Did you get smooth or textured? I have better adhesion on the smooth side of my current sheet.
I did some Stealthburner parts in ABS and everything came out okay but the one with the overhang never printed quite right for me, so it looks sloppy. I think the difference is that it had too much surface area, cooled, and warped. That’s what I’d be afraid of printing a box upside down, the heatbed has to compete against more air.
We must have found the same comment sections :) I’m going for a smooth one myself, I also saw better results on my current smooth sheet.
I didn’t have any issues with any of the stealthburner overhangs. There is the one bridge on stealthburner_printhead_rapido_rear_cw2 that’s not perfect, but it’s certainly good enough. Some pictures are here.
We must have found the same comment sections :) I’m going for a smooth one myself, I also saw better results on my current smooth sheet.
I ran into people on the Voron forums vouching for it. It sounds like there was a double sided honey badger offering at one point, but that’s no longer the case :( I wonder if buildtak would mind facing the bed from time to time…
I wonder if inverting the print so the solid surface was at the top would have helped with warping
I think it would
Boron are Core XY which means that in diagonals, only one motor is moving. That’s one of the reasons why your surface looks nicer on the boron at 45° than on the Cartesian printer which has to sync two motors to create a diagonal move.
For Asa, hot bed and chamber are critical as well as actively dehydrated spool.
Even if I print in the traditional orientation, my surface quality looks way better. My i3 clone’s extruder had horrible salmon skin and at that point in my journey I wasn’t willing to consider rebuilding the extruder.
Surface quality is also driver (+ driver settings) and motor related, and even the combination of them.
This is fair, and is part of what I meant by not being willing to modify the extruder (or the main board) before going off the deep end with the Voron.
I suspect having a gear reduction between the extruder motor and the extruder gear would go quite a ways towards helping. Swapping my Voron from a set screw gear to an integrated gear, that’s molded/pressed onto the shaft, helped too. That’s before even getting into the driver.
Yeah ridga or vzhextrudort style gears definitely help greatly. You could do a mihai style test to see if the artifacts on the i3 are mostly extruder related or from the XY motors.
Tuning drivers consistently for quality is going to require an oscilloscope, although there are some experiments with attaching an accelerator to the motor while doing a frequency sweep.
Of course you could just change settings and see if there is a visual difference, but there are too many settings and combinations to make that realistic.
Chamber temps need to be higher for such a long skinny print because it will contract significantly lengthwise. The fun part is that if you get better bed adhesion without higher chamber temps then it could bend the whole bed sheet into a taco temporarily. Try setting your bed at 110C for an hour before printing with the part fan blowing on the center of the bed to help circulate the air.
Haha, I’ve seen tacoed mag bed photos and know exactly what! Pure talking about. I’m wondering if this size/aspect ratio is even possible. I’ve printed large round ASA parts with no issues, but don’t know what design patterns do/don’t lens themselves to the material.
I’ll have to try a longer heat soak. I’m also thinking I should try more bedfans…
I have the nevermore under my Voron2 300 and it still struggles with prints like you posted. Switching from ACM to Plexiglass panels helped improved insulation somewhat. The hack that I use in a pinch for big prints is a terrarium heat lamp with temp control hanging from the top of the printer.
Supposedly, the filter does a better job with air flow but in either case, two fairly small fans in a bigger enclosure seems destined for struggle.
A heat lamp isn’t a bad idea. Did it solve your warping issues? Before I go that route, I’m tempted to try adding two more bedfans first. I should also add a chamber thermostor vs just waiting for a fixed time period.
When you said switchfrom ACM to Plexiglass, I’m guessing you meant the other way around (eg you have ACM panels now)? Where did you get them?
The heat lamp did help for the couple parts I was having issues with. I now mostly use a mini trident for most of my ABS printing. The heat lamp only comes out when I need to do a large print on the Voron2.
There was a Nero3D (Canuck Creator) video a while back where he said acrylic is better at insulating than ACM so I went from ACM to acrylic. Plus the smoked translucent acrylic looks better. I bought the ACM from PrintedSolid originally and have since reused it for other projects.
I swear by Buildtak surface for abs and also really like their nylon surface. Its enabled me to do brimless prints on both of them with no issue. The downside is it’s a consumable and runs about 50 cad for the 350 mm^2 v2, I can get multiple for my mk3s for the same price, have also swapped from the satin plate to buildtak for abs on that.
I also totally recommend Ellis’ superslicer profiles for the v2, there’s profiles all they way up to uhf+cht flow rates and there’s 45deg versions of all of them which as was pointed out does often make the edges look a bit nicer
With all that though, abs can be tough for larger objects and you really should have a heated chamber in that case, I tend to go petg for those parts where I don’t need high temp
Huh, maybe I’ll have to see if I can grab some buildtack. But before I do that I probably need to get my chamber temps up. The last thing I want is for the bed to get pulled up with the print. I do have 2x bedfans, so I’ll probably add two more. I also don’t have a chamber thermostor.
My profile is pretty close to Ellis’, including the 45 degree part orientation - not that I have a ton of choice there with parts this size, lol.
For sure, I couldn’t do 45 degree when I was printing a nevermore max, for the life of me I couldn’t get it to print nicely in abs. I’m planning to do some upgrades soon so I’m also going to up my bedfans to 4.
Do you have a toolhead PCB? A lot of them have a temp sensor on them, using that to monitor chamber temps.
I don’t have a tool head PCB. If/when I go CAN I’ll convert over. I made sure I have an inline connector for every group of wires going into my Stealthburner, so it’s still fast and easy to swap. That is probably where I’ll put the thermostor though. I’ve also used my hot end. Just leave it cold and it will read a delayed chamber temp.
When I ran ABS I used acetone and a scrap piece to make a glue that worked flawlessly on glass.
I think my chamber isn’t getting hot enough. After soaking for an hour, my unheated extruder extruder reaches about 45 C. I’m going to swap to better insulating panels, a dedicated chamber thermostor, add some more bedfans to see where that gets me.
New Lemmy Post: I like big beds and I cannot lie, pt 2. Any hints to improve ASA adhesion? (https://lemmy.world/post/11826778)
Tagging: #3dprinting(Replying in the OP of this thread (NOT THIS BOT!) will appear as a comment in the lemmy discussion.)
I am a FOSS bot. Check my README: https://github.com/db0/lemmy-tagginator/blob/main/README.md
